
What is WordPress Robots.txt and Why It Matters for Your SEO
A single text file can tilt your search visibility up or down. Roughly 40% of all web traffic comes from bots, according to long-running industry analyses of automated traffic (see Imperva’s Bad Bot Report). That means your site is probably visited more by software than by people. If those visits are inefficient or messy, the impact shows up in crawl waste, slower discovery, and weaker SEO. Your WordPress robots.txt choices set the ground rules for search engine crawlers and other web crawling bots. They either help your content get found faster or let bots spin their wheels in the wrong places. Source: Imperva Bad Bot Report.
So what is a WordPress robots.txt file? It is a plain text file that tells crawlers which parts of your site they should crawl and which parts to ignore. WordPress actually generates a virtual robots.txt for you if a real file does not exist. You can visit yourdomain.com/robots.txt right now to see what bots see. By default, that virtual file aims to allow normal crawling while keeping admin functionality out of the way. The key is understanding when and how to customize it for better WordPress SEO optimization. Small tweaks often lead to big wins in crawl budget optimization and cleaner search engine indexing.

- Control crawl budget so bots spend time on high-value pages, not system folders
- Reduce duplicate content indexing, which can dilute rankings and confuse crawlers
- Protect sensitive or low-value areas from being crawled, like admin paths or temp pages
- Improve site performance during peak bot activity by limiting needless fetches
- Point bots to your XML sitemap to speed up discovery of new and updated content
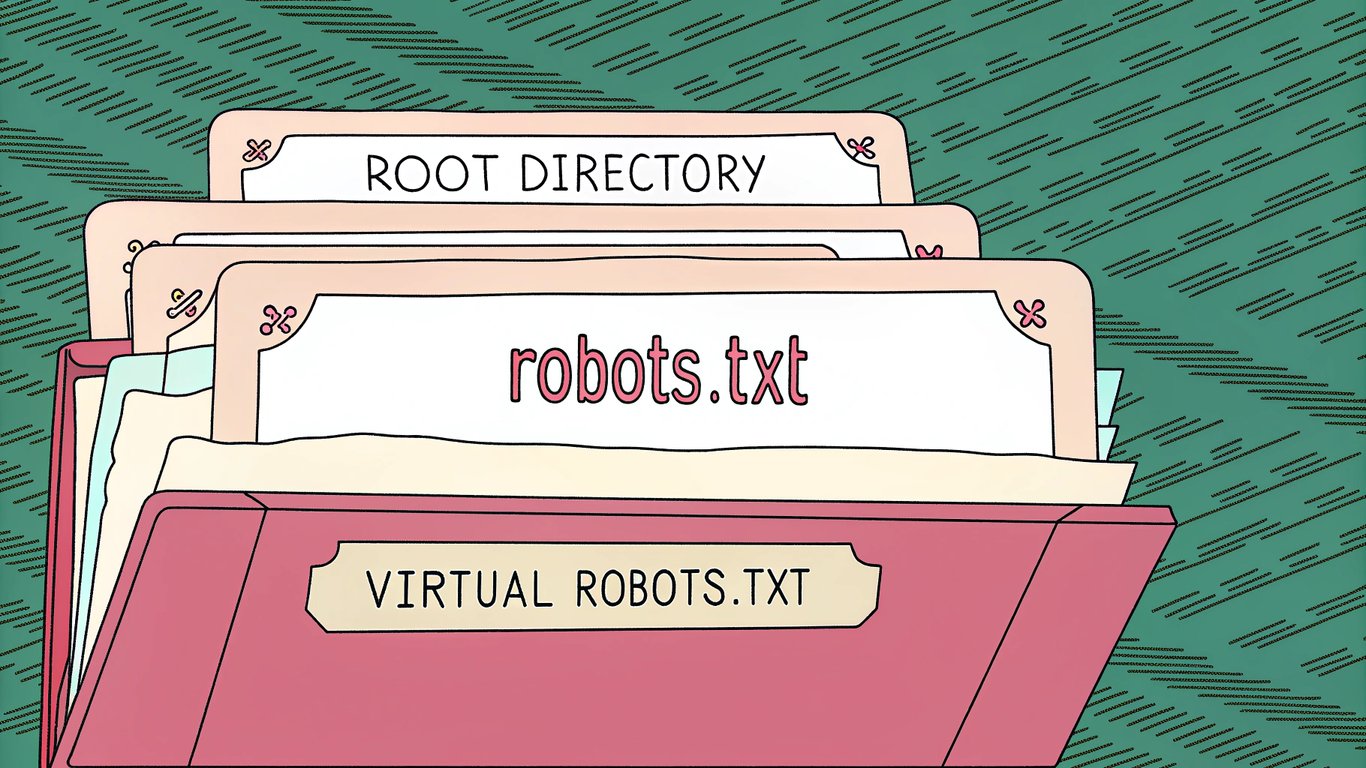
There are two flavors in WordPress, and the difference matters. The virtual robots.txt is served by WordPress when no file exists on the server. A physical file is one you upload to the site’s root directory. The physical file wins every time. If you are managing multiple WordPress sites through a workflow or platform like RepublishAI, knowing which one is live on each domain avoids nasty surprises.
Type | Where it lives | How it works | When to use |
|---|---|---|---|
Virtual robots.txt | Generated by WordPress | Served only if no physical file exists | Default, simple setups and quick starts |
Physical robots.txt | Root directory of your site | Overrides the virtual version | Precise control, multi-environment sites, audited SEO rules |
One important limit. Robots.txt is a courtesy standard. Well-behaved search engine crawlers follow it, but some bots ignore it entirely. This is why robots.txt is not a security tool. If content is truly sensitive, use passwords or server-level controls. Google puts it plainly in its docs, noting that robots.txt controls crawling, not access protection. See Google’s robots.txt overview.
Here is what you will get from this WordPress robots.txt guide. We will explain how the file is structured and where it lives. You will see the difference between virtual and physical files in action, then learn three safe ways to create or edit one. We will share proven rules that focus crawlers on the stuff that earns rankings, plus how to handle staging sites and the rise of AI crawlers. Finally, we will show you how to test everything in Google Search Console and fix common mistakes before they cost you traffic. If you care about WordPress robots.txt done right, you will leave ready to ship a clean, crawl-friendly setup.
Understanding WordPress Robots.txt File Structure and Location
You can view any site’s robots.txt in seconds. Just add "/robots.txt" to the end of the domain. For example: https://exampleblog.com/robots.txt. If the site is using WordPress, you’ll typically see a small text file that tells search engine crawlers what they can and cannot fetch. Keep that path in your back pocket. It is the fastest way to confirm your robots.txt file location and see what bots are being told right now.
Where to Find Your WordPress Robots.txt File
WordPress generates a virtual robots.txt by default. That means there is no physical file on your server, but WordPress serves one dynamically at yoursite.com/robots.txt. This file lives at the site’s root as far as crawlers are concerned.
When people reference the WordPress root directory, they mean the top-level folder of your site. It is the same place where wp-config.php resides. On most hosts, you will see it labeled public_html, httpdocs, or simply the site’s document root. If you upload a physical file named robots.txt to this folder, it will override the virtual output that WordPress creates.
That override behavior is important. A physical robots.txt at the root always wins. So if a plugin or your theme seems to be changing robots rules but you still see unexpected directives, check for an actual robots.txt sitting next to wp-config.php. Many teams forget they created one years ago.
If you manage multiple WordPress properties, this foundational setup really matters. Platforms like RepublishAI help teams run many sites. You still need a consistent robots.txt strategy across all domains to keep crawl rules aligned and your technical SEO tidy.
Default WordPress Robots.txt Content Explained
If you have not created a physical file, WordPress typically serves a minimal set of rules like this:
User-agent: *
Disallow: /wp-admin/
Allow: /wp-admin/admin-ajax.php
- User-agent: * – This line applies the rules that follow to all crawlers. The asterisk is a wildcard that means every bot.
- Disallow: /wp-admin/ – This tells crawlers not to fetch the WordPress admin folder. It is private and not meant to be indexed.
- Allow: /wp-admin/admin-ajax.php – This is an exception so front-end features that rely on admin-ajax keep working. Many themes and plugins use it for asynchronous requests.
You will notice a few things missing. There is no sitemap line by default. There is also no rule for /wp-includes/. That is by design. WordPress keeps it minimal so you can customize to your own setup.
One more wrinkle. Some hosting providers inject their own robots rules on staging or even production. They might add a blanket Disallow on staging subdomains, or include a Sitemap line if they manage your XML sitemap. If something looks off, check your host’s control panel or documentation for robots-related defaults.
If you want to see how WordPress builds this output, developers can read the official filter that modifies robots content here: robots_txt hook on WordPress.org. It is also useful to compare your settings against Google’s rules and pattern support here: Google robots.txt documentation.
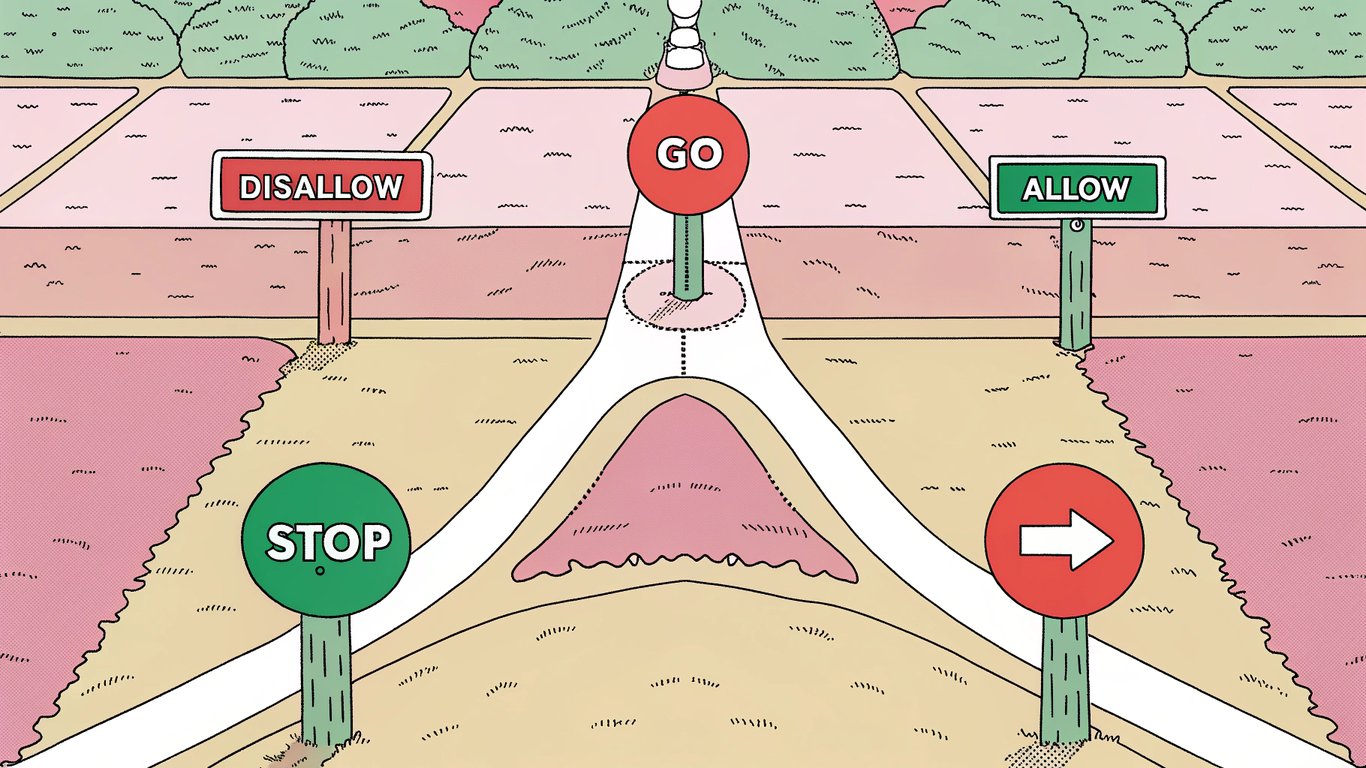
Key Directives: User-Agent, Disallow, Allow, and Sitemap
User-agent sets the audience for your rule block. The user-agent specification can target all crawlers with an asterisk or call out a specific bot by name. Examples include Googlebot for Google and Bingbot for Microsoft Bing. You can stack multiple blocks if you want different rules per crawler.
- All bots: User-agent: *
- Google only: User-agent: Googlebot
- Bing only: User-agent: Bingbot
A quick note on pattern matching. Most major crawlers support the wildcard * and the end-of-line marker $. That lets you write more precise targets. For example, Disallow: /*.pdf$ blocks all URLs that end with .pdf. Not every bot follows every pattern, but Google and Bing do document support for these.
Disallow tells crawlers not to fetch matching paths. This is the core of your disallow directive strategy. Paths are relative to the domain root and they are typically case sensitive. So "/Blog/" is not the same as "/blog/" on most servers.
- Block your admin area: Disallow: /wp-admin/
- Block a specific folder: Disallow: /private-files/
- Block a single page: Disallow: /thank-you.html
- Block all query URLs for a tool: Disallow: /search?
- Block file types with patterns: Disallow: /*.zip$
Allow is the exception tool. Use it to open a path inside a blocked folder. It is most common with WordPress’ admin-ajax endpoint, but you can apply it anywhere you need a carve-out.
- Block admin, allow AJAX: Disallow: /wp-admin/ then Allow: /wp-admin/admin-ajax.php
- Block a folder, allow a subfolder: Disallow: /media/ then Allow: /media/public/
Sitemap points crawlers to your XML sitemap. This is not a rule that blocks or allows. It is a hint that helps bots discover your content faster. You can include one or several lines if you run multiple sitemaps. If your SEO plugin generates a sitemap index, reference that single index URL.
- Single sitemap: Sitemap: https://exampleblog.com/sitemap.xml
- Sitemap index: Sitemap: https://exampleblog.com/sitemap_index.xml
- Multisite example: Sitemap: https://site-a.example.com/sitemap_index.xml and Sitemap: https://site-b.example.com/sitemap_index.xml
A few path rules that trip people up. Trailing slashes matter because they change the path match. Disallow: /folder/ targets everything inside that folder. Disallow: /folder targets any path that begins with "/folder", which can include "/folder-old". Also, robots.txt only understands path-level instructions. It does not read your page’s meta robots tags. Those are separate signals.
Directive | Purpose | Example |
|---|---|---|
User-agent | Target a specific crawler or all crawlers | User-agent: * or User-agent: Googlebot |
Disallow | Tell crawlers not to fetch matching paths | Disallow: /wp-admin/ or Disallow: /*.pdf$ |
Allow | Make an exception inside a blocked path | Allow: /wp-admin/admin-ajax.php |
Sitemap | Point crawlers to your XML sitemap for faster discovery | Sitemap: https://exampleblog.com/sitemap_index.xml |
If you want to double-check syntax against Google’s official guidance, bookmark this page: Google’s robots.txt documentation. For WordPress-specific behavior and developer hooks, see robots_txt on WordPress.org and the pluggable function reference do_robots.
Last thing. If you operate several WordPress sites under one umbrella, consistency is your friend. Teams using RepublishAI still benefit from a shared checklist that covers user-agent targeting, critical Disallow paths like /wp-admin/, and a reliable Sitemap directive. That baseline makes audits easier and keeps crawlers focused on the right URLs across all your properties.
How to Create and Edit Your WordPress Robots.txt File (3 Methods)
There are a few reliable ways to create and edit a robots.txt file in WordPress. Each one fits a different comfort level. If you prefer plugins, you can use the Yoast SEO plugin or All in One SEO. If you like full control, you can upload a physical file by hand. I will walk you through all three so you can pick the approach that feels right and aligns with SEO best practices.
Method 1: Using Yoast SEO Plugin
Yoast is a popular choice for many site owners. It typically provides a straightforward editor for your robots.txt. If you already use Yoast for titles and sitemaps, keeping robots.txt in the same place keeps things simple.
- Install and activate the Yoast SEO plugin from WordPress.org.
- In your WordPress dashboard, go to SEO > Tools.
- Click the File editor option.
- If you do not have a robots.txt yet, click Create robots.txt file.
- Use the on-page editor to add or edit directives. Keep syntax exact and use one directive per line.
- Click Save changes to robots.txt, then visit yoursite.com/robots.txt to verify.
Notes and gotchas: Some managed hosts disable file editing inside plugins for security. If you do not see the File editor or the Create robots.txt button is disabled, your hosting provider or file permissions probably block it. In that case, try Method 2 or Method 3. Also, your site might already expose a virtual robots.txt even if no physical file exists. Creating a physical robots.txt in the WordPress root directory will replace what plugins and WordPress output virtually.
What a screenshot would show here: the Yoast Tools screen with the File editor link, then a simple text area showing the current robots.txt content and a Save button.
Method 2: Using All in One SEO (AIOSEO) Plugin
AIOSEO includes a dedicated Robots.txt Editor that many people find more visual. It acts like a built-in robots.txt generator. You choose a user agent, set a path, and the plugin formats the directive correctly. If you are newer to technical SEO or just want fewer chances to mistype a path, this interface helps.
- Install and activate All in One SEO (AIOSEO) from WordPress.org.
- Open All in One SEO > Tools in your dashboard.
- Click the Robots.txt Editor tab.
- Toggle on Custom Robots.txt to enable editing.
- Add rules using the provided fields. Choose a User Agent and enter a Directory Path like /wp-admin/. Use the interface to add Disallow or Allow lines as needed.
- Preview changes in real time in the on-screen preview panel.
- Click Save Changes, then visit yoursite.com/robots.txt to confirm.
AIOSEO keeps you inside a guided flow. That reduces syntax mistakes and helps you build rules without memorizing every directive. It is still up to you to choose the right paths, so double check spelling and slashes. If your host restricts file operations, you might see limitations here too. That is rare but possible.
What a screenshot would show here: the AIOSEO Robots.txt Editor with the Custom Robots.txt toggle on, a dropdown for user agents, input fields for directory paths, and a live preview box showing the exact file output.
Method 3: Manual Creation via FTP or File Manager
If you want total control or your host blocks plugin editors, create a physical robots.txt. This is the most dependable way because what you upload is exactly what crawlers see. It also helps when you manage multiple sites and prefer a version-controlled workflow.
- Create a plain text file named robots.txt. Use lowercase and the .txt extension. Save as standard UTF-8 without special characters.
- Add your directives line by line. For example: User-agent: *, Disallow: /wp-admin/, and Allow: /wp-admin/admin-ajax.php. Keep spacing consistent.
- Connect to your site using FTP or SFTP with a client like FileZilla. Or open your hosting control panel File Manager (for example cPanel or Plesk).
- Upload the file to the WordPress root directory. This is the top-level folder for your site, the same location as wp-config.php, often named public_html or www on many hosts.
- Verify the robots.txt file location by visiting https://yourdomain.com/robots.txt in a browser. If you see the exact content you uploaded, you are done.
Warning: A physical robots.txt in the root directory overrides any virtual or plugin-generated output. If you create and upload a file, that is the version search engine crawlers will read. This is usually what you want, but remember to keep it updated.
A quick visual guide that would help: a screenshot of your FTP client showing robots.txt sitting next to wp-config.php in the root folder, plus a browser tab open to yourdomain.com/robots.txt that displays the same text.
Common mistakes to avoid when doing a manual FTP file upload: saving as robots.txt.txt by accident, placing the file in /wp-content/ instead of the root, or uploading to a staging subdomain while testing a production site. If your site runs on HTTPS and non-www, always check the exact canonical hostname in your browser when you verify the file.
When to use each method
Method | Best for | Pros | Watch-outs |
|---|---|---|---|
Yoast SEO plugin | Site owners already using Yoast who want a quick editor | Fast, familiar UI inside WordPress; keeps everything in one place | File editor may be disabled by hosting or not visible in some setups |
AIOSEO plugin | Beginners or visual thinkers who prefer a guided robots.txt generator | Structured fields reduce syntax mistakes; real-time preview of output | Must still choose correct paths; hosting restrictions can still apply |
Manual via FTP/File Manager | Advanced users, agencies, or anyone who needs full control and portability | Direct ownership of a physical file; consistent behavior across environments | You must manage the file yourself; wrong location means bots will not see it |
Extra tips that save headaches: If you see different robots.txt content than expected, clear any server or CDN cache, then recheck /robots.txt. Keep the file lean. Store rules that reflect structure, not every single URL. And test after each change. A tiny typo in a path can block content you wanted indexed.
A few practical examples to try once your editor or file is open: add User-agent: * on the first line so directives apply to all crawlers. Disallow /wp-admin/ and Allow /wp-admin/admin-ajax.php to match common WordPress needs. If you have an XML sitemap at /sitemap_index.xml or /sitemap.xml, include a Sitemap: line pointing to it. That is a small detail that improves discovery. It is also a good reminder that robots.txt is not a security tool. Sensitive content should be protected with logins or HTTP auth, not just a Disallow.
If you manage multiple sites, standardize your process. Pick one method per stack and document it. For example, use AIOSEO on smaller blogs for consistency, and a manual robots.txt in the WordPress root directory for enterprise sites where change control matters. Consistency reduces mistakes and makes it easier to audit the exact robots.txt file location during reviews.
WordPress Robots.txt Best Practices and Common Use Cases
Dialed-in robots.txt rules can improve crawl efficiency, cut server strain, and protect the SEO value you have already earned. You are basically pointing crawlers toward your highest value URLs. That is smart crawl budget optimization, especially on active blogs, shops, and media sites.
Essential Rules Every WordPress Site Should Include
Here is a practical baseline most WordPress sites can start with. It focuses bots on real content and sitemaps, not your WordPress plumbing.
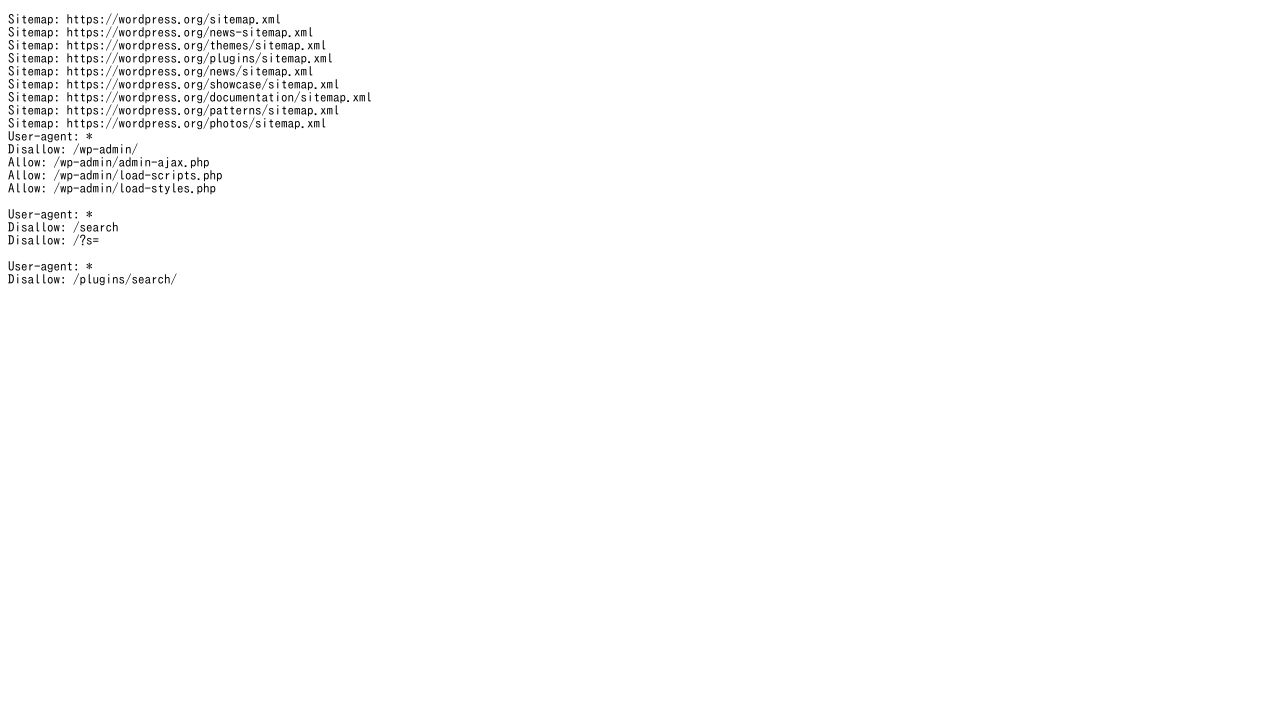
User-agent: * Disallow: /wp-admin/ Allow: /wp-admin/admin-ajax.php Disallow: /wp-includes/ Disallow: /wp-content/plugins/ Disallow: /wp-content/themes/ Allow: /wp-content/uploads/ Sitemap: https://example.com/sitemap.xml
- Disallow: /wp-admin/ keeps crawlers out of your admin area. Allow: /wp-admin/admin-ajax.php preserves needed AJAX calls that power front-end features.
- Disallow: /wp-includes/ hides core files that do not represent unique content.
- Disallow: /wp-content/plugins/ and Disallow: /wp-content/themes/ reduce noise from plugin and theme directories. Crawling these rarely helps rankings.
- Allow: /wp-content/uploads/ ensures images and media can be crawled. That helps image search and rich results.
- Sitemap: gives crawlers a direct pointer to your XML sitemap, which speeds discovery of priority URLs. See Google’s docs on sitemaps and robots.txt at Google Search Central.
Important note: blocking plugin and theme directories can sometimes block CSS and JavaScript that Google needs to render pages. If your theme or plugins serve assets from those folders, add these allowances for modern engines that support wildcards:
# Optional allowances if you blocked themes/plugins User-agent: * Allow: /*.css$ Allow: /*.js$
Why this baseline works: it nudges crawlers toward your posts, pages, products, and images. It also shields the internal WordPress structure that does not need indexing. If you run a headless setup or a custom asset pipeline, you might relax or refine these rules. Test with Google Search Console’s URL Inspection to confirm that required CSS and JS are not blocked.
Blocking Specific Bots and Managing Crawl Delay
Crawl delay settings can help when aggressive bots are pounding your server. The crawl-delay directive is honored by some engines like Bing and Yandex. Google ignores it. If spikes from bots are slowing your site, you can throttle cooperative crawlers and block abusive ones outright.
Examples of blocking known problem bots by user-agent specification (names here are examples; always check your server logs first):
User-agent: AhrefsBot Disallow: / User-agent: SemrushBot Disallow: / User-agent: MJ12bot Disallow: /
You can set crawl delays for different bots. This slows down compliant crawlers without blocking them:
# Slow down Bing and Yandex, do not affect Google (it ignores this) User-agent: Bingbot Crawl-delay: 10 User-agent: Yandex Crawl-delay: 10 User-agent: * Disallow:
Google does not use crawl-delay. If you need to limit how fast Google crawls, use the legacy crawl rate control in Google Search Console Help. Availability can vary by site. Also read Google’s robots rules overview here: official robots.txt guidance.
- Use Disallow for bots that provide no value and waste resources.
- Use crawl-delay only if server performance is impacted and you have confirmed the bot is cooperative.
- Revisit settings after major content or infrastructure changes. Crawl needs evolve.
Handling Staging Sites and Development Environments
Your WordPress staging site should not compete with your production site in search. Duplicate content can dilute rankings and confuse crawlers. The simplest and most reliable move is to block everything on staging.
User-agent: * Disallow: /
Many managed hosts handle this automatically for subdomain staging environments. WP Engine and WordPress VIP typically prevent indexing on non-production environments by default. See their support docs to confirm the current behavior: WP Engine Support and WordPress VIP Documentation.
- Before launch: remove the global block and restore your standard robots.txt.
- Double check with Google Search Console that key URLs are crawlable.
- If you password protect staging, keep that in place. Robots.txt is not security.
- When cloning production to staging, ensure the staging domain still has Disallow: /.
One more tip. If you maintain multiple environments or multisite installs, create a small checklist for deploys. Robots.txt changes are easy to forget, and the cost of an accidental site-wide Disallow on production can be brutal.
Preventing AI Scrapers from Copying Your Content
AI crawler blocking is now a real part of WordPress SEO best practices for publishers. Robots.txt is a polite request. It helps with reputable AI crawlers that honor robots. It will not stop bad actors, but it reduces exposure and signals your preference. If you create original reporting, product research, or high value tutorials, this matters.
Common, documented AI user-agents you can disallow:
# OpenAI User-agent: GPTBot Disallow: / # Common Crawl (used by many AI projects) User-agent: CCBot Disallow: / # Anthropic User-agent: anthropic-ai Disallow: / User-agent: Claude-Web Disallow: /
Official references are worth bookmarking: OpenAI’s GPTBot policy here, Common Crawl’s CCBot details here, and Anthropic’s crawler guidance for Claude here and here.
If your site publishes AI-assisted content at scale, it is still your IP. You probably want to restrict third party training or bulk reuse. Robots.txt is a starting point. For stronger controls, consider rate limiting, CDN bot filtering, or legal terms that disallow automated scraping. Those fall outside robots.txt, but they complement it.
Bot user-agent | Owner | Primary purpose | Docs |
|---|---|---|---|
Googlebot | Web search indexing | ||
Bingbot | Microsoft | Web search indexing | |
DuckDuckBot | DuckDuckGo | Search crawler | |
AhrefsBot | Ahrefs | SEO link data collection | |
SemrushBot | Semrush | SEO link and site data | |
MJ12bot | Majestic | Backlink index | |
CCBot | Common Crawl | Web-scale corpus for research and AI | |
GPTBot | OpenAI | LLM training and safety research | |
anthropic-ai / Claude-Web | Anthropic | LLM training and evaluation | |
Applebot | Apple | Apple services, Siri suggestions |
Quick sanity checks for AI crawler blocking:
- Add AI crawler rules to the bottom of your robots.txt so they are easy to find.
- Test a few sample URLs in your logs to confirm requests stop after changes propagate.
- Remember some scrapers ignore robots.txt. Use additional controls if this is mission critical.
When to use each rule type
- Disallow: Hide boilerplate directories like /wp-admin/ or low value feeds, search results pages, and duplicate archives. Use it to reduce waste in crawler paths.
- Allow: Create exceptions inside blocked areas. Typical example is admin-ajax.php or allowing images under /uploads/ while the parent folder is disallowed.
- Sitemap: Always include at least one. If you run news or video sitemaps, list them all.
- Crawl-delay: Use sparingly for non-Google bots when server performance suffers. It is a throttle, not a fix.
- User-agent targeting: Apply bot-specific rules when behavior differs. For example, block a single abusive crawler without affecting everyone else.
If you manage multiple WordPress properties, create a shared template and then tune per site. Large publishers and agencies often do this. It keeps your wp-content directory from getting overcrawled, preserves image access, and still gives you room to tighten or relax rules per brand.
Last thing. Always validate changes. Use Google Search Console to check that your core templates and assets are not blocked. If you are building content workflows with AI at scale, even a lightweight audit cadence helps. Teams using tools like RepublishAI to run multi-site content production should bake robots.txt reviews into their launch checklist. It is boring work. It saves rankings.
Testing, Troubleshooting, and Optimizing Your WordPress Robots.txt
Treat your robots.txt like a live switchboard. One wrong line can hide your entire site from search engine indexing. That is why testing and ongoing checks are non-negotiable if you care about WordPress SEO optimization and crawl budget optimization. I always validate changes before pushing anything live.
How to Test Your Robots.txt File
Google’s tools are still the gold standard for verifying how major crawlers interpret your file. The legacy robots.txt tester has lived inside Google Search Console for years. You might see it under Crawl or under legacy tools depending on your property and interface version.
- Add and verify your site in Google Search Console. If you are new to GSC, follow Google’s setup guide: Add & verify a property.
- Open the robots.txt Tester. In some accounts it appears under a Crawl or Legacy Tools section. If you do not see it, you can still test with other tools listed below.
- Review the current robots.txt contents that Google has fetched for your domain.
- Enter a specific URL on your site and click to test whether it is Allowed or Blocked based on your rules.
- Scan for syntax warnings. The tester highlights obvious errors and unsupported patterns so you can fix them fast.
Prefer a quick independent check or do not see the legacy tester? Use the free robots.txt tester from RepublishAI. Paste your file, run tests against sample URLs, and spot issues before crawlers do. Whichever tool you pick, test after every edit and before launching a new site or theme.
Common Mistakes and How to Fix Them
These are the errors I see most when auditing WordPress sites. Each one can tank visibility or waste crawl budget. Use a robots.txt tester after you apply the fixes.
- Blocking CSS or JavaScript files, which hurts mobile SEO and rendering | Wrong: "User-agent: * Disallow: /wp-includes/" and Disallow: /wp-content/ | Fix: Do not block asset folders that serve front-end files. A safe approach is to leave /wp-includes/ and /wp-content/ open for assets or add explicit allow rules for assets if you must restrict: "Allow: /wp-content/uploads/" and allow theme/plugin asset paths as needed.
- Accidentally blocking the entire site | Wrong: "User-agent: * Disallow: /" | Fix: Only block sensitive areas. Example: "User-agent: * Disallow: /wp-admin/ Allow: /wp-admin/admin-ajax.php". Remove the global Disallow immediately if your site should be indexed.
- Case sensitivity in paths | Wrong: "Disallow: /Blog/" when your path is "/blog/" | Fix: Match exact casing used by your URLs. Paths in robots.txt are typically case sensitive, so stick to the real path, usually lowercase on WordPress: "Disallow: /blog/" if you truly need to block that folder.
- Incorrect wildcard usage that either does nothing or blocks too much | Wrong: "Disallow: /*?utm=" or "Disallow: /wp-*" when you only meant to block a specific plugin path | Fix: Use wildcards carefully and remember not all bots support them. For Google and many modern bots, patterns like "Disallow: /*utm_" can catch tracking parameters. Test patterns on sample URLs before saving.
- Blocking important content sections like posts or your blog | Wrong: "Disallow: /blog/" on a site where all articles live under /blog/ | Fix: Remove that rule or limit to true low-value sections. Keep content directories crawlable so they can be indexed. If you want to control indexing on specific pages, use meta robots noindex on those pages rather than robots.txt.
- Forgetting to switch from staging rules to production | Wrong on staging: "User-agent: * Disallow: /" copied to live site during launch | Fix: Before go-live, replace staging rules with your production rules. Then retest in Google Search Console and your preferred robots.txt tester.
- Running both a physical robots.txt file and a plugin-generated virtual file | Symptom: Edits made in a plugin do not show at domain.com/robots.txt | Fix: Keep one source of truth. A physical robots.txt in your site root overrides a virtual one. Either remove the physical file or disable the plugin editor so you do not create conflicts.
Monitoring Crawl Performance and Making Adjustments
After you clean up mistakes, keep an eye on how bots actually crawl your WordPress site. Open Google Search Console and check the Crawl Stats report. It will not optimize your file for you, but it shows whether your robots.txt rules are helping or wasting crawl budget.
- Crawl requests per day: Big spikes can be normal during site moves or new content pushes. If bots spend thousands of hits on tag archives or parameter URLs, consider tightening robots.txt or using canonical and noindex where appropriate.
- Kilobytes downloaded per day: If this trends way up without new content, it can be bot activity on low-value assets. Review Disallow rules and your CDN caching.
- Average response time or time spent downloading a page: If this climbs, your server may be straining under crawl. You probably need caching, a CDN, and maybe softer access for nonessential bots.
When to adjust robots.txt based on data: If you see crawl budget wasted on pagination, faceted URLs, or obvious duplicates, add targeted Disallow lines for those patterns. If your core content is under-crawled after a site restructure, simplify the file. Remove overly broad blocks and make sure your XML sitemap is linked in robots.txt so bots can find your important URLs fast.
Caching note you should not skip: robots.txt is often cached by browsers, CDNs, and search engines. Changes may take time to propagate. If you use a caching plugin, clear it right after you update robots.txt. Examples: in WP Rocket click Clear cache, in W3 Total Cache click Empty all caches, in LiteSpeed Cache click Purge all. If you use a CDN like Cloudflare, purge the cache for /robots.txt or run a full purge if needed. Then retest with your robots.txt tester and in Google Search Console.
Robots.txt is a simple file with outsized impact. Test every change, watch crawl stats, and keep your rules focused on helping search engines reach your best content. If you have not checked yours lately, take 5 minutes now. Open Google Search Console to review crawl data, then paste your file into the RepublishAI robots.txt tester for a second opinion. You will catch issues earlier and stick to true SEO best practices that improve indexing and performance.