Introduction
Welcome to the world of WordPress, the most popular content management system (CMS) on the planet. With its user-friendly interface and powerful features, WordPress powers over 43% of all websites globally. Whether you're a blogger, business owner, or developer, WordPress offers a versatile platform to create stunning websites with ease.
Proper installation of WordPress is the first step to unlocking its full potential. A smooth installation ensures that your website runs efficiently and securely, setting the stage for a successful online presence. But how do you get started? Let's explore the different methods available for installing WordPress.
There are several ways to install WordPress, each catering to different needs and skill levels. Here's a quick overview:
- One-click installations: Ideal for beginners, these are offered by many WordPress hosting providers and can have your site up and running in less than 5 minutes.
- Manual installations: For those who prefer a hands-on approach, this method involves downloading WordPress, setting up a database, and configuring files manually.
- Local development installations: Perfect for developers, this method allows you to set up WordPress on your local machine for testing and development purposes.
This guide is designed for everyone—from complete beginners to seasoned developers. You'll learn about the WordPress installation requirements, explore various installation methods, and gain insights into troubleshooting common issues. Whether you're setting up your first blog or developing a complex site, this guide has got you covered.
By the end of this guide, you'll have the confidence to install WordPress efficiently, regardless of your technical expertise. So, let's dive in and get your WordPress site up and running!
Ever feel stuck or unsure about a specific step? Don't worry! Our WordPress Basics & Setup Beginner tutorials are here to help. Covering everything from installation to essential plugins, these tutorials provide a solid foundation for your WordPress journey. For more guidance, check out our resources at WordPress Basics & Setup.
Prerequisites for Installing WordPress
Before you jump into the exciting world of WordPress, it's crucial to have all your ducks in a row. Setting up WordPress is a breeze when you have the right prerequisites in place. Let's break down what you need to get started on the right foot.

Web Hosting Requirements
Choosing the right web hosting is like picking the perfect home for your website. You want it to be reliable, fast, and secure. Here are the minimum hosting requirements and some recommended specifications to ensure your WordPress site runs smoothly.
Requirement | Minimum Version | Recommended Version |
|---|---|---|
PHP | 7.4 | 8.0 or higher |
MySQL | 5.6 | 5.7 or higher |
Apache/Nginx | Any | Latest stable version |
Memory Limit | 128MB | 256MB or more |
Most WordPress hosting control panels will allow you to check and adjust these settings. It's always a good idea to opt for a hosting provider that offers easy scalability and excellent customer support.
Domain Name Setup
Your domain name is your website's address on the internet. Configuring it correctly is essential for your site to be accessible. Once you've purchased a domain, you'll need to configure the DNS settings to point to your hosting server. This process usually involves updating the nameservers provided by your hosting provider.
If you're unsure about how to set up your domain, many hosting providers offer step-by-step guides or even customer support to walk you through the process. Remember, a well-configured domain is the first step to a successful online presence.
Essential Tools
- An FTP client like FileZilla for transferring files to your server.
- Database management tools such as phpMyAdmin to handle your WordPress database.
- A text editor like Notepad++ or Sublime Text for editing the WordPress configuration file.
These tools are your best friends when it comes to managing and configuring your WordPress site. They help you handle everything from file transfers to database management with ease. For a more detailed guide on how to use WordPress read our complete beginners guide.
By ensuring you have these prerequisites in place, you'll be well-prepared to tackle any installation challenges that come your way. A little preparation goes a long way in preventing common installation issues, making your WordPress journey as smooth as possible.

One-Click WordPress Installation Methods
Installing WordPress can be a breeze, especially with the advent of one-click installation methods. These automated processes are designed to simplify the setup, making it accessible even for those who might not be tech-savvy. Let's explore how these methods work and why they are a popular choice among users.
Popular Hosting Control Panels
- cPanel installation process: Most hosting providers offer cPanel, a user-friendly interface that includes a one-click WordPress installer. Simply log in to your cPanel, find the WordPress installer under the 'Softaculous Apps Installer' section, and follow the prompts. It's as easy as pie!
- Plesk installation steps: Plesk is another popular control panel that supports one-click WordPress installations. Navigate to the 'Applications' tab, select WordPress, and click 'Install'. Plesk handles the rest, ensuring your WordPress site is up and running in no time.
- Other control panel methods: Some hosting providers offer custom control panels with similar one-click installation features. Look for options like 'Install WordPress' or 'QuickInstall' in your hosting dashboard.
Automated Installation Scripts
Automated installation scripts are the backbone of one-click installations. Tools like Softaculous, Fantastico, and QuickInstall are widely used across various hosting platforms. These scripts automate the entire process, from creating a WordPress database setup to configuring essential settings. They ensure that your WordPress site is installed with the latest version, reducing the risk of security vulnerabilities.
Common Installation Issues
- Database connection errors: Sometimes, the automated script might face issues connecting to the database. This can often be resolved by checking your database credentials in the WordPress configuration file.
- Permission issues: Incorrect file permissions can prevent WordPress from functioning correctly. Ensure that your WordPress file permissions are set to recommended levels to avoid such hiccups.
- Installation timeout problems: If the installation process takes too long, it might time out. This can usually be fixed by increasing the PHP execution time limit in your hosting control panel.
While one-click installations are incredibly convenient, it's essential to be aware of these common issues and their solutions. By understanding the potential pitfalls, you can ensure a smooth and successful WordPress installation. Remember, the WordPress hosting control panel is your ally in this process, providing the tools and settings needed to manage your site effectively.
In conclusion, one-click WordPress installation methods offer a hassle-free way to get your site up and running. By leveraging popular hosting control panels and automated scripts, you can save time and effort, allowing you to focus on what truly matters—creating great content. So, why not give it a try and see how easy it can be to start your WordPress journey?

Manual WordPress Installation Guide
If you're ready to roll up your sleeves and get hands-on, the manual WordPress installation process is a rewarding way to understand the inner workings of your website. This method gives you full control over every aspect of the setup, from database creation to file configuration. Let's break it down step by step.
Database Creation
- Log in to your hosting control panel and navigate to the database section.
- Create a new MySQL database. Give it a name that's easy to remember.
- Set up a new database user. Ensure you create a strong password for security.
- Assign the user to the database and grant all necessary permissions.
Remember, the database is the heart of your WordPress site, storing all your content and settings. Proper setup here is crucial for a smooth manual WordPress installation.
WordPress File Upload
Next, you'll need to upload the WordPress files to your server. This is where an FTP client comes in handy. If you're unfamiliar with FTP, think of it as a bridge between your computer and your web server.
- Download the latest version of WordPress from the official site.
- Extract the downloaded ZIP file to a folder on your computer.
- Open your FTP client and connect to your server using your FTP credentials.
- Navigate to the root directory of your website (often called 'public_html' or 'www').
- Upload all the extracted WordPress files to this directory.
During the upload, ensure that WordPress file permissions are correctly set to avoid any access issues later. Typically, directories should have permissions set to 755 and files to 644.
Configuration File Setup
With your files in place, it's time to configure WordPress to connect to your database. This involves editing the wp-config.php file, which acts as the bridge between WordPress and your database.
Once your configuration file is set, visit your website's URL to complete the installation. WordPress will guide you through the final steps, including setting up your site title and admin account.
Congratulations! You've successfully completed a manual WordPress installation. This method not only gives you a deeper understanding of your site's structure but also prepares you for any future customizations or troubleshooting.
Post-Installation Setup and Configuration
Congratulations on installing WordPress! Now, let's dive into the essential post-installation steps that will set your site up for success. These steps are crucial for ensuring your website runs smoothly and securely. From configuring basic settings to implementing security measures, we'll cover everything you need to know.
Initial WordPress Settings
- Start by accessing the WordPress admin dashboard. Here, you'll find all the tools you need to manage your site.
- Navigate to Settings > General to configure your site's title, tagline, and timezone. These elements are vital for your site's identity and functionality.
- Next, head over to Settings > Permalinks to set up a user-friendly URL structure. Opt for the 'Post name' option to enhance SEO and readability.
- Ensure your user account is secure by updating your password and reviewing user roles under Users > All Users.
Essential Security Measures
Security is a top priority for any website. Begin by installing a reputable security plugin to protect against common threats. Regularly update your WordPress version, themes, and plugins to patch vulnerabilities. Additionally, consider enabling two-factor authentication for an extra layer of security. These steps form the backbone of a robust WordPress security setup.
Recommended First Steps
- Choose a theme that aligns with your brand and install it via Appearance > Themes. A well-designed theme enhances user experience and site aesthetics.
- Install essential plugins to extend your site's functionality. Consider plugins for SEO, caching, and contact forms to start with.
- Prepare your initial content. Draft your first blog post or page, and set up your site's navigation menu under Appearance > Menus.
By following these steps, you're not just setting up a website; you're laying the foundation for a successful online presence. Remember, the WordPress admin dashboard is your command center—get familiar with it, and you'll be well on your way to mastering your site.
Local WordPress Installation Guide
Setting up WordPress locally can be a game-changer for developers and hobbyists alike. It allows you to experiment without the fear of breaking a live site. Plus, it's a fantastic way to test themes and plugins in a safe environment. Let's explore how you can get started with local WordPress development on different platforms.
Installing on Windows
- XAMPP installation steps: Download XAMPP from the official website and run the installer. Once installed, start the Apache and MySQL modules. Place your WordPress files in the 'htdocs' directory and access the setup via your browser.
- Local by Flywheel setup: Download and install Local by Flywheel. Create a new site by following the on-screen instructions. It's user-friendly and perfect for beginners.
- WAMP configuration: Install WAMP and launch it. Move WordPress files to the 'www' directory. Open the WAMP server and navigate to 'localhost' to begin the WordPress installation.
Installing on Mac
- MAMP installation process: Download MAMP and install it. Start the servers and place WordPress files in the 'htdocs' folder. Access the setup by visiting 'localhost:8888' in your browser.
- Local by Flywheel for Mac: Similar to the Windows version, download and install Local by Flywheel. It's intuitive and offers a seamless setup process.
- DesktopServer setup: Install DesktopServer and follow the wizard to create a new WordPress site. It's a straightforward tool for local WordPress development.
Installing on Linux
- LAMP stack setup: Install Apache, MySQL, and PHP. Place WordPress files in the '/var/www/html' directory. Configure permissions and access the setup via your browser.
- Docker installation: Use Docker to create a containerized WordPress environment. It's efficient and ensures consistency across different setups.
- Local environment configuration: Customize your local setup with tools like Vagrant or VirtualBox for a more controlled development environment.
Local Development Best Practices
When working in a WordPress development environment, it's crucial to maintain a structured workflow. Regularly back up your local site and database. Consider using version control systems like Git to track changes. When you're ready to move your site live, ensure you have a migration plan in place. Tools like Duplicator or All-in-One WP Migration can simplify this process. Remember, local WordPress development is not just about building; it's about creating a seamless transition to a live environment.
Host-Specific Installation Guides
Choosing the right WordPress hosting provider can make a world of difference in your website's performance and ease of use. Each provider offers unique features and installation methods, which can significantly impact your WordPress experience. Let's explore some popular hosting providers and what they bring to the table.
Popular Hosting Providers
Host | Installation Method | Special Features |
|---|---|---|
Bluehost | Auto-installer | Domain included |
SiteGround | Site Tools | Advanced caching |
WP Engine | Automated | Staging environments |
Installation Differences
When it comes to installing WordPress, the method can vary depending on the hosting provider. For instance, Bluehost offers a straightforward auto-installer that simplifies the process, making it ideal for beginners. On the other hand, SiteGround uses its custom Site Tools, which not only aids in installation but also provides advanced caching options to boost performance. WP Engine, known for its managed WordPress hosting, offers automated installations with the added benefit of staging environments, allowing you to test changes before going live.
Provider-Specific Features
- Managed WordPress features: Many providers offer managed services that handle updates, backups, and security, freeing you to focus on content creation.
- Performance optimizations: Providers like SiteGround offer advanced caching and CDN integration to ensure your site loads quickly.
- Security implementations: Hosting providers often include security measures such as SSL certificates and malware scanning to protect your site.
Selecting a hosting provider isn't just about installation ease; it's about the long-term benefits they offer. Managed WordPress hosting can be a game-changer, especially if you're not tech-savvy. These services handle the technical aspects, allowing you to focus on growing your site. Performance is another critical factor. With features like advanced caching and CDN, your site can achieve faster load times, which is crucial for user experience and SEO.
Security is paramount, and many WordPress hosting providers include robust security features. From SSL certificates to regular malware scans, these features help safeguard your site against potential threats. When choosing a provider, consider these aspects to ensure you get the best value and performance for your WordPress site.
In conclusion, understanding the differences between WordPress hosting providers and their specific features can help you make an informed decision. Whether you prioritize ease of installation, performance, or security, there's a provider out there that fits your needs. Remember, the right choice can significantly enhance your WordPress experience.
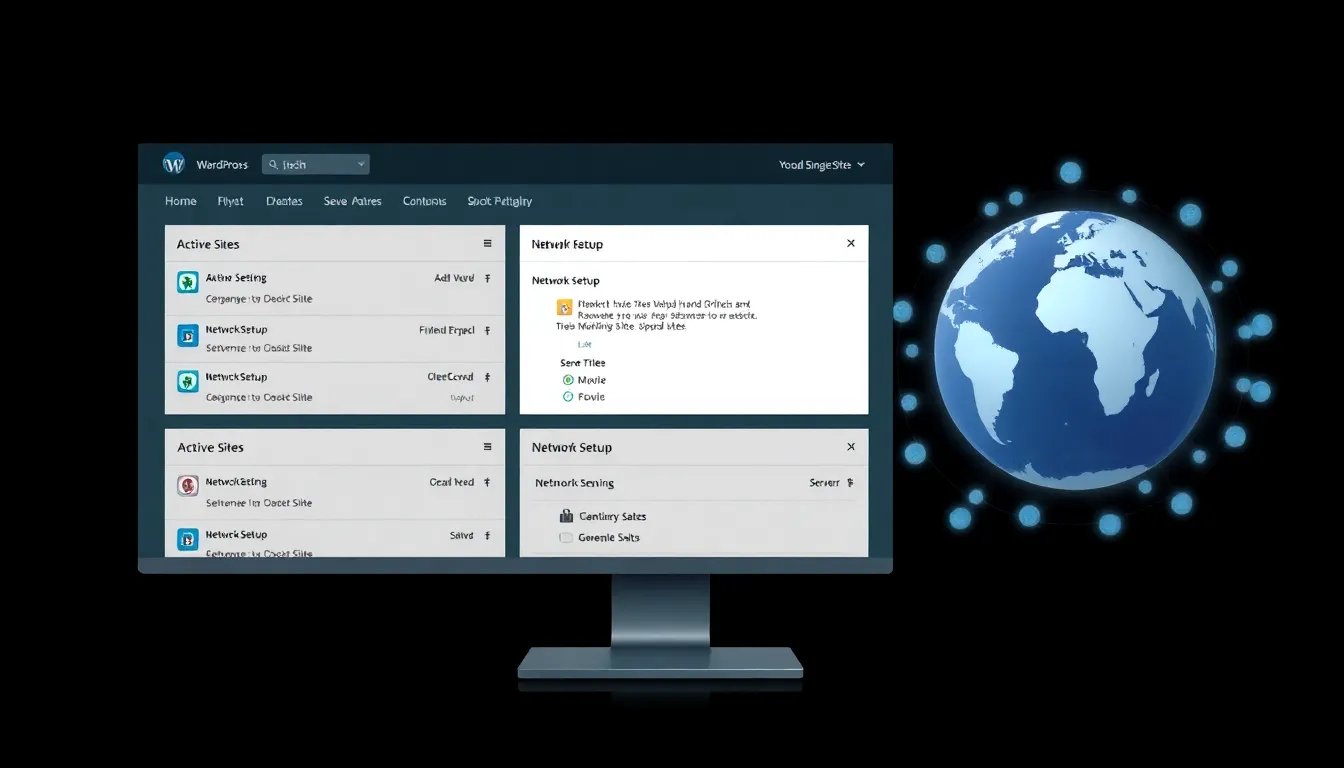
Multisite Installation and Configuration
Setting up a WordPress multisite network can be a game-changer for those managing multiple sites. Imagine having the power to control several sites from a single dashboard! This feature is perfect for businesses, educational institutions, or anyone who needs to manage a collection of sites efficiently. Let's explore how to get this setup rolling.
Enabling Multisite Features
- wp-config.php modifications: Begin by opening your wp-config.php file and adding the line
define('WP_ALLOW_MULTISITE', true);just above the line that says/* That's all, stop editing! Happy blogging. */. - Network setup process: Once you've saved the changes, head over to your WordPress dashboard. Under Tools, you'll now see a Network Setup option. Follow the on-screen instructions to configure your network.
- Domain configuration: Decide whether you want to use subdomains (e.g., site1.example.com) or subdirectories (e.g., example.com/site1). This choice will depend on your hosting setup and personal preference.
Network Configuration
Once your multisite network is enabled, it's time to dive into the WordPress network configuration. This involves setting up your network admin dashboard, which acts as the control center for all your sites. Here, you can manage themes, plugins, and user roles across the network. It's like being the captain of a ship, steering multiple sites with ease.
Site Management
- Adding new sites: From the network admin dashboard, you can add new sites with just a few clicks. Simply navigate to Sites and select Add New. Fill in the necessary details, and voilà, a new site is born!
- User management: Manage users across your network by assigning roles and permissions. This ensures that each site has the right people with the right access.
- Network settings: Customize your network settings to suit your needs. This includes configuring site registration options, default themes, and more.
The WordPress multisite setup is a powerful tool that fills a significant gap in managing multiple sites. With the right configuration, you can streamline your workflow and focus on what truly matters—creating great content. Whether you're running a blog network or managing client sites, multisite offers a centralized solution that simplifies site management.
Troubleshooting Common Installation Issues
Installing WordPress can sometimes feel like a breeze, but occasionally, you might hit a snag. Let's explore some common WordPress installation issues and how to tackle them head-on. Whether it's a pesky database connection error or the infamous White Screen of Death, we've got you covered with practical solutions and prevention tips.
Database Connection Errors
- Connection string problems: Ensure your wp-config.php file has the correct database name, username, and password.
- Database user permissions: Verify that your database user has the necessary permissions to access the database.
- Host configuration issues: Double-check your database host information, especially if you're using a remote database server.
If you're still facing issues, consider reaching out to your hosting provider for support. They can often provide insights into server-specific configurations that might be causing the problem.
Permission Issues
File and directory permissions can be a real headache if not set correctly. Ensure that your WordPress files have the right permissions to avoid installation hiccups. Typically, directories should be set to 755 and files to 644. This setup balances security and functionality, preventing unauthorized access while allowing WordPress to run smoothly.
White Screen of Death
- PHP memory limits: Increase your PHP memory limit by editing the wp-config.php file or contacting your host.
- Plugin conflicts: Deactivate all plugins and reactivate them one by one to identify the culprit.
- Theme issues: Switch to a default WordPress theme to see if your current theme is causing the problem.
The White Screen of Death can be frustrating, but with a bit of patience and systematic troubleshooting, you can pinpoint the issue. If all else fails, consider seeking help from WordPress support forums or a professional developer.
Memory Limit Problems
Running into memory limit problems? This is a common WordPress installation issue that can be resolved by increasing the PHP memory limit. You can do this by adding the following line to your wp-config.php file: define('WP_MEMORY_LIMIT', '256M');. If you're unsure, your hosting provider can assist with server configuration solutions.
Remember, when dealing with WordPress error solutions, it's crucial to keep a backup of your site before making any changes. This way, you can always revert to a previous state if something goes awry. And if you're ever in doubt, don't hesitate to seek support from the WordPress community or your hosting provider.
Security Best Practices During Installation
When setting up WordPress, security should be at the forefront of your mind. A secure installation not only protects your site from potential threats but also ensures a smooth operation in the long run. Let's explore some essential security measures you can implement right from the start.
Secure Configuration Steps
- Set up a strong admin account: Avoid using 'admin' as your username. Opt for a unique username and a strong password to enhance security.
- Secure your
wp-config.php: This file contains sensitive information about your database. Ensure it's protected by setting appropriate file permissions and moving it to a non-public directory if possible. - Clean up installation folders: Remove any unnecessary files and folders post-installation to reduce potential vulnerabilities.
File Permission Settings
File/Directory | Recommended Permission | Reason |
|---|---|---|
wp-config.php | 400 or 440 | Sensitive data |
wp-content | 755 | Allow updates |
Setting the right WordPress file permissions is crucial. Incorrect permissions can expose your site to unauthorized access. Always ensure that your files and directories have the least privilege necessary to function.
Database Security
Your database is the heart of your WordPress site, storing all your content and settings. To protect it, consider implementing database hardening measures such as using a unique table prefix, setting strong database user passwords, and regularly backing up your database. These steps are part of a comprehensive WordPress security setup.
SSL Implementation
- Install an SSL certificate: This encrypts data transferred between your server and users, providing an additional layer of security.
- Force HTTPS configuration: Ensure all traffic is redirected to HTTPS to maintain a secure connection.
- Fix mixed content issues: Check for any non-HTTPS elements on your site and update them to prevent security warnings.
Implementing SSL not only boosts security but also improves your site's SEO ranking. It's a simple yet effective way to protect your users' data and enhance trust.
By focusing on these security best practices during installation, you lay a solid foundation for a secure WordPress site. Remember, a proactive approach to security can save you from potential headaches down the road.
Performance Optimization After Installation
Once you've got WordPress up and running, it's time to make sure it performs like a well-oiled machine. WordPress optimization is crucial for ensuring your site is fast, efficient, and ready to handle traffic spikes. Let's explore some key areas to focus on for boosting your site's performance.
Caching Configuration
- Page caching setup: Implementing page caching can drastically reduce load times by storing static versions of your pages. This means your server doesn't have to work as hard to deliver content to visitors.
- Browser caching configuration: By setting up browser caching, you allow visitors' browsers to store certain elements of your site locally. This reduces the need to reload resources every time they visit.
- Object caching implementation: Object caching stores database query results, which can significantly speed up dynamic content delivery. Consider using plugins that support this feature for optimal WordPress caching setup.
Database Optimization
- Regular database cleanup is essential. Remove unnecessary data like post revisions, spam comments, and trashed items to keep your database lean.
- Perform table optimization to defragment tables and improve query performance. Many database management tools offer this feature.
- Set up scheduled maintenance to automate these tasks, ensuring your database remains in top shape without manual intervention.
Server-Side Improvements
Optimization | Impact | Implementation |
|---|---|---|
PHP Version | Speed & Security | Host settings |
Memory Limits | Resource Usage | wp-config.php |
GZIP Compression | Load Times | .htaccess |
Content Delivery Setup
To further enhance your site's speed, consider implementing a Content Delivery Network (CDN). A CDN distributes your site's static files across a network of servers worldwide, reducing latency and improving load times for global visitors. Additionally, optimize your assets by compressing images and minifying CSS and JavaScript files. These steps are vital for a comprehensive WordPress optimization strategy.
Conclusion and Next Steps
Congratulations on reaching the end of this comprehensive guide on how to install WordPress! By now, you should have a solid understanding of the various installation methods, from one-click solutions to manual setups. Whether you're a beginner or a seasoned developer, these steps are designed to get your WordPress site up and running smoothly.
Installation Checklist
- Pre-installation requirements verified
- Installation method completed
- Security measures implemented
- Performance optimizations applied
This checklist ensures that you've covered all the essential steps for a successful WordPress installation. It's a handy tool to verify that nothing has been overlooked, especially when it comes to WordPress maintenance and WordPress updates.
Recommended Resources
- Official WordPress documentation
- Community support forums
- Professional development resources
These resources are invaluable for ongoing learning and troubleshooting. Whether you're looking to deepen your knowledge or solve specific issues, these links provide a wealth of information.
Future Maintenance
Maintaining your WordPress site is crucial for its longevity and performance. Regular WordPress updates are essential to keep your site secure and running efficiently. Consider setting up a schedule for updates, backups, and performance checks. For proven strategies for higher rankings, read our AI Content Creation SEO guides.
Remember, a well-maintained site not only performs better but also provides a better experience for your visitors. Keep exploring, learning, and optimizing to make the most out of your WordPress journey!